Friday 30 September 2011

Regimental Fire & Fury ACW (1): Gettysburg - Little Round Top

Vincent's Brigade holds Little Round Top (Vincent being the lone commander figure atop of Little Round Top, with sword posed heroically aloft). Chamberlain the "Gallant" [F&F Regimental terminology] Commander of the 20th Maine (Union troops below on the far Right Hand Side) faces the onrushing Confederate hoard and their terrible Rebel Yell.


"Today sir you are the leftmost unit of the Union line. Today sir you must be stubborn, for if you fail the Union line will be flanked". No pressure then! A slightly wider picture of Little Round Top is seen below.


The Union stand fast, hold their fire until they see the "whites" of their enemy's eyes and roll a 10! Devastating fire yes as two stands of Confederates fall, but the 20th Maine immediately go "ammo low" (with no chance of replenishing during the scenario, which has to last another six turns). They don't like making it easy for you in the Union Army.


The first Rebel charge is successfully checked but there will be more to come. The wider battlefield picture (below) shows the disjointed Union line. The fortified defence of Little Round Top by Vincent's Brigade  is rather compromised by their supporting brigade's forward line of deployment. Already the Rebels see and seize the opportunity. 


The Rebels commit to another frontal assault.


They face Veteran Union infantry who take aim and hope to emulate their friend Chamberlain.

Thursday 29 September 2011

Gawd don't press that button

As per the Hitch Hikers Guide to the Galaxy, don't press that button which says "Don't Press Me".

Much to my consternation I did and I don't think I will ever get my "original style" settings ever back again. Let me know if you find the blog hard to read. The digital content may be too high for people with low connection speeds etc.

I did try something called "Dynamic" settings and that was a media blitz of epic proportions, which was great to look at it (if you could handle and see all the pictures).

I was also looking at the "monetise your blog" option and thinking was it worth it? Does it spoil the read of it and do you actually generate anything worthwhile in the income sense. I'd appreciate your opinions/experiences.

Anyway this is really a test to see if I can still post to my own blog!

Renaissance Reinforcements (4): Germanic Men-At-Arms basing the Horses and Riders

From individual stands to group base:


A "Can you spot the difference" photograph?


Next: Texture base, paint and add a little flock.

Monday 26 September 2011

Return of the Painting Tray

Not only return of the "painting tray" but the "painting tray" has been allocated a spot in the main house ... STOP PRESS ... !!! Plenty of space for models (notice TWO HMS Hood's, one metal and one plastic, and a collection of "H" Class RN destroyers in 1/1200 scale, and two Impetus bases of Germanic "Men-At-Arms" 28/25mm), paints and brushes. All illuminated by overhead halogen light which managed to "blow a fuse" four nights ago.


Admittedly the painting area has an effective "cloak of concealment" (i.e. a quick close the writing desk and nobody would guess at the existence of my hobby, bar the "quirky" library, not many Dan Brown novels there!). Meanwhile here's a sneak preview, see below, of my 25/28mm Germanic "Men-At-Arms", painted and part based (they still need a little paintwork and flocking on the bases).


The "man cave"is not as remote as before, so there are interruptions but it is much warmer and I get more cups of hot tea delivered. Look carefully (see below) and you should be able to see the lower hull of HMS Hood in 1/200 scale and Charles V Holy Roman Emperor (HRE) in 28/25mm.


My work can be scrutinised by wife, children and cat (sometimes the latter is more interested). The Royal Navy is in town, 1/1200 (darker grey) plastic Airfix "Sink the Bismarck" kit in front of a "newspaper special" metal kit. The destroyers are Argentinian copies of the ubiquitous RN "H" class purchased amongst a random lot on eBay. The intention is to use six of them them back as RN destroyers escorting the "Mighty Hood" and "PoW" as they head towards the Denmark Strait.    


The final chap to show you is an old friend:


"Maurice the Spy", aka Airfix Lysander passenger, under-coated and base-painted but waiting for that loving mid/highlight as he runs for his life away from the Gestapo or jealous French husband.

Rest assured the above tidiness is long since a thing of the past ;)

Friday 23 September 2011

My Second Battle of Impetus: Gripping Finale

The table was now aligned east-west, with "pike" bearing down on cavalry from the north and cavalry riding at "shot" in the south.


Your classic spinning top battle, with clockwise rotation. The cavalry struck first (see below)


But miraculously the cavalry attack was bounced, the "fire-sticks" worked, and the cavalry (with genius general attached retreated back) whence it came (as seen below, moving with the assistance of the god-like hands of a nearby helpful spectator.).


Ego hurt and abashed, unit damaged but a flip-flop move to use to his advantage the general spurred his cavalry back in for more.


Lady luck smiled beguilingly at the genius general, but shook her head for a second time they were sent reeling back. This time hurt and disordered in front of an angry charging block of pike (see below).


Crunch! Disordered pike or not they were still very, very deadly. What's more as the general's unit evaporated in chaos and disorder, fleeing is all directions he was thrown from his horse and slain cruelly beneath a Landsknecht's boot. A roll was needed, the disaster total for the cavalry army was now ten, still insufficient to break it but the effect of the loss of the general on his army could cause them to lose heart.   


Fate again was disdainful to the pitiful pleas of man, but this time to those of the Landsknecht's, as the cavalry army did not even notice the passing of this would-be Alexander. Time was pressing and the club's doors were closing but one last turn was played.


The hammerhead fell upon an isolated unit of "shot" (see above: the cavalry was where the damaged unit of "shot" had been). The critical break point in my army was reached. The full turn had still to be played out though, a draw was technically possible, my pike did have a slim chance of contacting an enemy unit and therefore breaking the cavalry armies cohesion too, but alas my discipline rolls failed to get me into contact my and instead my pikes were lowered in submission to parley.

Despite losing it was certainly an enjoyable game. Given the age (young teenage) of my experienced opponent I only hope he wasn't too tired for school in the morning. If only his history teacher knew what he had done the night before.

:)

Thursday 22 September 2011

My Second Battle of Impetus: The "Pike" Rebound and the "Big Gun" copis it

While horse flesh clashed on the hill, as my mighty knights/Men-At-Arms tottered, the Renaissance Pikemen were finally driven with renewed frenzy and rushed headlong at the enemy camp (this reversal in fortune was partly assisted by readily needed coaching tips from the sidelines, as gamers from other finished games of Impetus gathered, drinks in hand as spectators to this battle).


Multiple successful rolls of discipline and a disdainful attitude to the inevitable disorder amongst the packed ranks, the pike steamroller drove all the way across table, scattering a pitiful skirmish formation (a mere "speed bump" as chronicled by the now drunken spectators) and clattered into the enemy camp. Now you see it (above) and now you don't (below):


The thought of fierce Pikeman adorned with plundered frilly cavalry pantaloons and breeches caused much amusement to the throng watching. Within the space of five minutes the disaster scores had evened out to a more balanced (3 + camp=3 + skirmishers=1) seven/ten (I too had lost a lowly skirmish unit=1 + existing nine).


The pike were not finished yet, they about faced to support the sister pike formation intent on skewering some cavalry. I must admit the thought of pike chasing down horse did seem a little unlikely or strange, but this was an Impetus learning experience. Meanwhile I lined up my "shot" to defend my cannon against a cavalry charge from the hill (on reflection perhaps they should have reformed/moved with the pike).


The inevitable attack came from the hill, deft cavalry manoeuvring made short work of my bronze piece and I thought it was all over.


However adjudication from the side revealed that even with ten disaster points my army was not yet broke (there is a lot of value tied up in that pike and so far it was untouched). Game still on, but just another unit of shot would do for my opponent..  

Next: The Gripping Finale

Wednesday 21 September 2011

My Second Battle of Impetus: The Darkest Hour

My camp gone (three disaster points accumulated), my artillery piece looking vulnerable and rampant cavalry in my rear at the hands of a genius commander. Meanwhile on the up-side I was killing his "stubborn infantry" [stubborn as in it negated my lovely cavalry impetus factors] but on the down-side it meant trading my valuable knights and Men-At-Arms in the process. Deep, large formations of Men-At-Arms are very impressive as they can transfer casualties to their rear ranks, keep the front rank fresh and keep going.  


What could go wrong next, apart from "shot" hiding in pike failing to come out which grinds the Renaissance killing machine to a halt for a couple of turns until things disentangle themselves (see below: the rather static looking pike formations below looking devoid of wings of "shot", all of which are hiding in the midst of the "pike", stopping them move). The cavalry formation on my 'baseline' where my camp was is definitely NOT friendly!. 


It is looking rather perilous for those knights/Men-At-Arms stuck on a hill, their rear exposed to the deep penetrating cavalry clump. Before they could be rounded on from the rear the knights expire the fighting infantry to their front, but at least my Men-At-Arms finally can some satisfaction and kill their tormentors, only to see a hoard of Cataphract cavalry come charging in (bows unslung for a stinging missile attack).


Told you so, the rear attack is lined up meticulously, despite their deep formation the Men-At-Arms are going, going  ...


Still going, going (Cataphracts to the front, medium cavalry to the rear), fighting bravely  ...


But finally "gone". I am at nine disaster points to my opponents three. My only hope is to get my infantry going fast rather than like at the dawdle so far, but is it all still too little, too late?

Next: Crunch of Pike

Tuesday 20 September 2011

My Second Battle of Impetus: Things start moving

Facing a genius general has its disadvantages, like inevitably going first and showing your hand. The first big mistake is shown below. Maintain aim and focus, do not just wander over the battlefield.


I started by breaking the cardinal ancient maxim of "do not fight where you do not have to". Do not simply extend the line because it's the done (and bad thing). Guard your flanks and put appropriate troops in appropriate terrain. My knights and and Men-At-Arms are wandering over nice defensive infantry terrain. A clever man would have refused this flank and advanced his pike blocks at great speed (to see what was behind the crest of the hill).


The pike does move but slowly (what's behind the hill?). I was also experimenting with the "shot" fixing itself onto the pike in "wings" to gain a protective bonus if attacked by cavalry (it disappears into the block on a successful "discipline roll").


I find out what is behind the crest, spear armed shock absorbing infantry that can stand up to attacking shock cavalry in this terrain. My mobile troops have become immobile. Hmm, not good. But look what is happening over on the left.


My unit of "shot" were disordered and shot up by a fast moving unit of bow armed cavalry that charged in for the kill. The "shot" ducked inside the pike block instead of "tuffing it out". Sensible if I had a back-stop. OK second mistake. If only I had refused the right and kept a reserve of cavalry, it could have creamed this attack but alas it is now "stuck into solid hard infantry". Or have turned the pike block gently as to have covered the shot in a ZoC (Zone of Control) rather than have it face straight ahead - the latter being a Impetus "defensive wibble" move one has to learn. Alternatively I should have raced at his horse with my pike!


My pike blocks were also going static with "shot" hiding inside of them. Defensive bonus yes, but an offensive limitation. Result, deep penetration and "bang goes the camp". The poor old gun just could not swing round in time to get a shot.
 
Ow. This is really a smarting learning tutorial. Still if only if I could get those pike blocks moving. Next: Just when you thought it could not get any worse ...

1/1200 Sink the Bismarck: HMS Suffolk County Class Cruiser Conversions

Time to twin HMS Suffolk with HMS Norfolk:

http://airfixtributeforum.myfastforum.org/archive/1-1200-sink-the-bismark-conv.-article-on-hms-suffolk-kit__o_t__t_24497.html

Saturday 17 September 2011

My Second Battle of Impetus: This time it's for real

The 28/25mm Renaissance boys were packed up and transported down to the club for a friendly blooding. I am still borrowing my horse types and a "bit of pike" as I like to use the more packed (sixteen as opposed to eight figures per single) rank "aesthetic" formations.


I set up against a horse army, an experimental choice by the player as he wanted to see how it played. His words, your Renaissance (pike) looks very scary (and I hope it did). I tried to constrain the battlefield frontage as much as possible. I got a river and that shaved off a third of the battlefield, I put a forest on the other bank and I had a secure flank. I then placed a hill to my right hand side which was NOT a good move  I was being greedy for defensive terrain but I have an offensive army, I should have noted the paradox. In hindsight I should have "given" it to my opponent as a distraction.


He was over yonder, lots of bow armed cavalry.


A close up of his bow armed Cataphracts (the big silver formation) above, plus somewhere "hidden" are some foot in "ambush". Interestingly he has a "genius" general. On his left we see his camp guarded by a detachment of cavalry (bow armed of course) and some skirmish types.


So far, so good, I thought my left flank of infantry was secure against the river and was happy my armoured mass of cavalry (Germanic Men-At-Arms and Burgundian knights) was in its correct position over on my right. This was an error, as I had stuck them behind that silly hill I insisted on putting near me!


A final side-long glance at the table before we start. It does look pretty.

Next Movement

Thursday 15 September 2011

Renaissance Reinforcements (3): Germanic Men-At-Arms - Horses and Riders

Horses are now united with their riders:


Two ranks deep so hence twelve figures or there about, needed for the "large" formation allowed in Impetus. Front rank charging, back rank with lances raised, a nasty sight:


They are covered in almost as much armour as those crazy Gendarmes from France:


Lots of Anita's Acrylic Metallic Black used with varying amounts of Mithril Silver from Games Workshop (the latter was really to use it up before it went completely solid). Finally a watered down black wash to pick up some details and then just a trace of silver highlighting again.

Used three tone painting all the way through.

Sunday 11 September 2011

Normandy Breakout Tutorial: Part III

The British assault reaches its zenith.

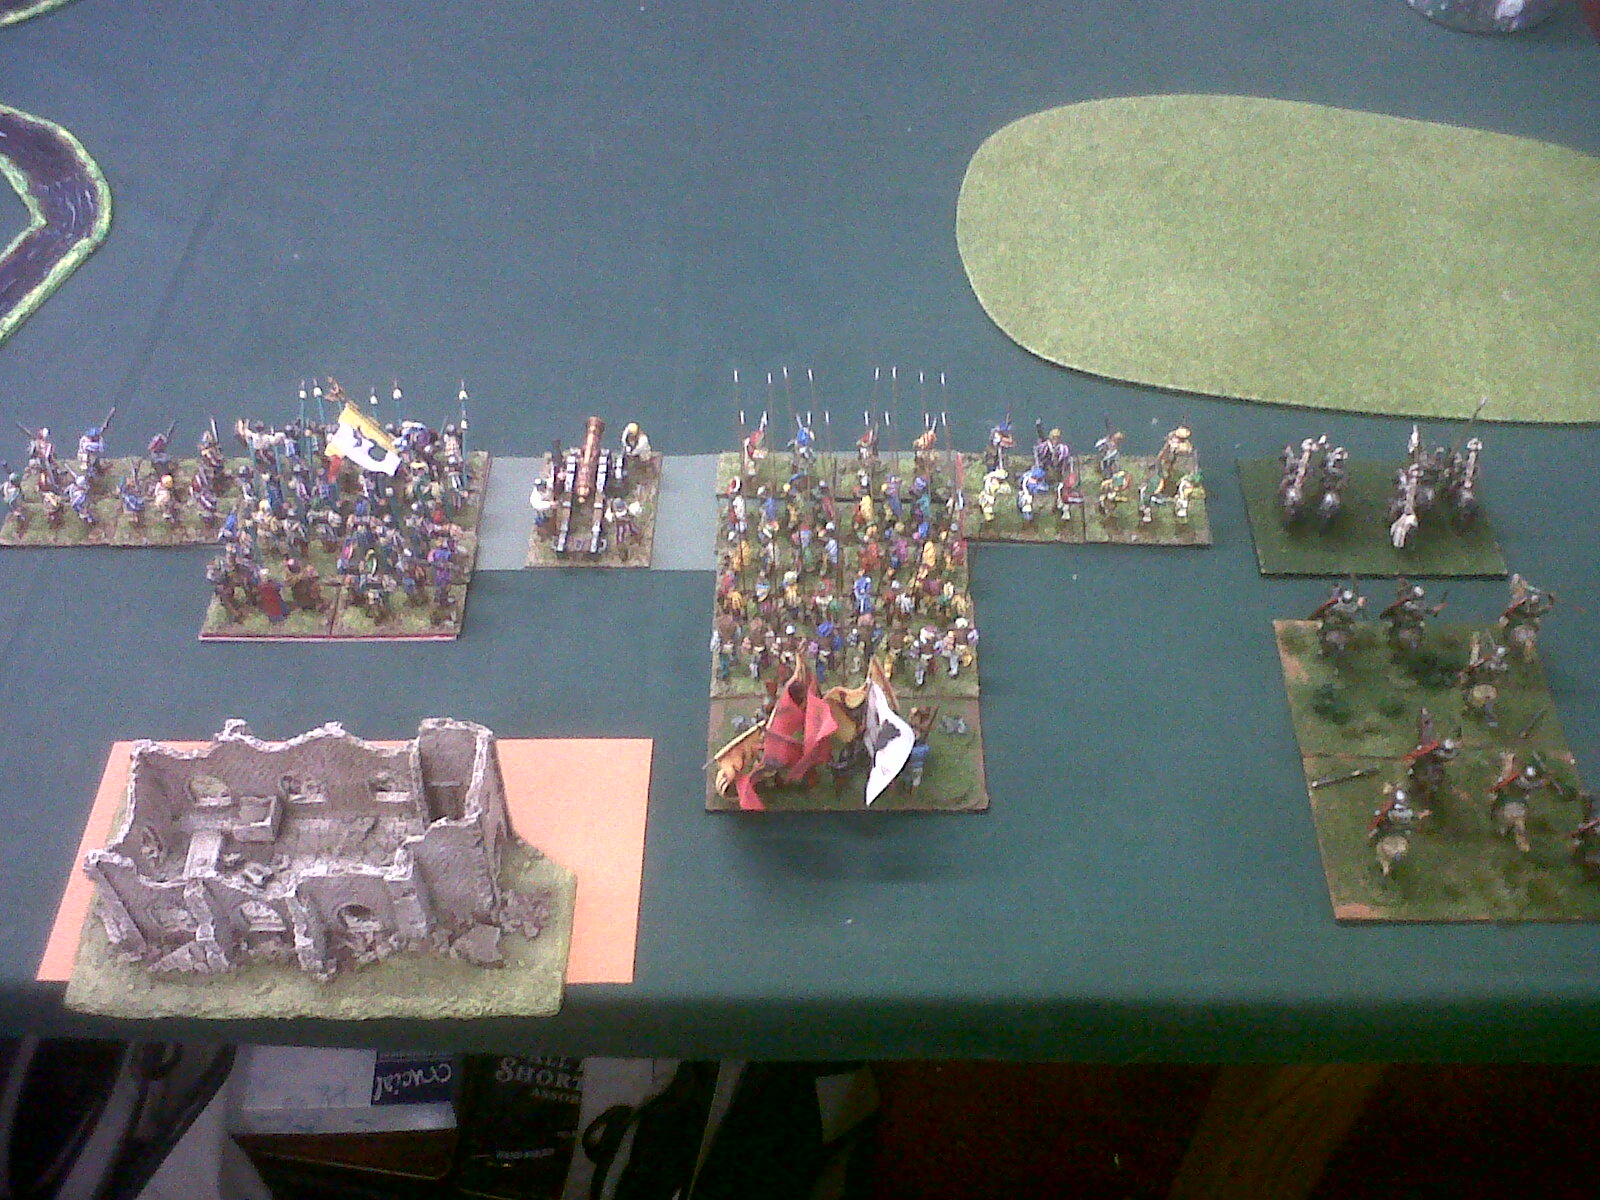
The intense German defensive fire created mayhem on the foot-slogging companies of the armoured infantry, the left hand side assault force (see below). Two companies are raging in a pitched battle (in front of the smokescreen), while there is a  "mounted" armoured company is behind it, resting its rear on the RTR backed up like a "beached whale" waiting for its "exploitation opportunity to come". (Note: On the tabletop, no model half-tracks just the infantry stands facing in a different direction, we'll have to sort this out as 1/300 kit is quite economical). Sadly the white square in front of the Germans denotes a dead British platoon.  


Never under  estimate the staying power of regular German infantry in 1944. Another space in the British infantry line again denotes the loss of another British platoon.


The British commander throws in his "ace in the hole", an armoured over-run attack from the rear. Note the RTR is now "fighting" with the Cromwell's winning the tank versus anti-tank (PAK) duel in the wood, sterling work by the 7th Armoured. This meant the half-tracks avoided a nasty "PAK-trap". On the down side the artillery had to stop because of the danger of "friendly-fire" taking out the attackers.


The British infantry in front of the Germans had reorganised into a static firing line but is rather a "depleted" five from an original of eight fighting stands, but at long last this reinforced German infantry company with supporting PAK company. has been cracked. However it took too long, instead of a sudden break-through it turned into a costly war of attrition. Time up: a defensive tactical win for the Germans as they had time to reorganise another defensive line a mile back, strategically the British push on as ordered by Monty.

A good learning game though and I'm look forward to the next one.

Review and Lessons Learned:

Although successful the plan was more WWI than WWII, the reliance on artillery followed by an infantry attack then with a mobile armoured punch for the exploitation phase. I tinkered with but lacked true "combined arms" that could have ousted and upset a strong defensive position much quicker. It let the German infantry position show a text-book "graceful degradation" instead of creating a "nexus of failure/fear", a critical point where everything looked bleak for them that the Battalion morale cracks. The German battalion with "average dice rolls" stayed on to the bitter end, with a respectable 50% effective strength (Note: 'effective strength' does not necessarily mean "battlefield casualties" but rather active fighting units).   

The main plan was sound in principle, concentration in force over a narrow frontage with an identified main thrust and a soak-off force guarding its flank. However the plan included a fragile timing element which presupposed a battle event (not needing to take a wood), when a more ambitious plan would have unhinged the German front - "take the wood if possible". In old Spearhead terms it was an arrow drawn too short on the map, in BGC is was too short an "Op Zone" with a near objective chosen instead of a faraway objective. If the faraway objective was impossible then a command order could have reassigned a "rally point" for the battalion to consolidate on. I think I have learned my lesson here, Keep It Simple Stupid (KISS)!

The greatest failing was the force mix. The frontage could still have been reduced into three mutually supporting parallel columns, each with their own individual track of attack. In total two thirds (twelve stands wide) of the frontage of eighteen that I used (wider frontage implies more incoming fire can be directed on you). With hindsight: On the left I would have set the armoured infantry, in the middle the RTR to get it into the action right from the start and finally the foot-sloggers to the RHS. In this way the PAK would have had to shoot at the tanks, the infantry at the infantry and by mixing up the armoured infantry dismounting and moving a fluid attack could have dislocated a fairly standard German defense. It must be noted that this flank did not have to contend with the likes of a Stug III and Stug IV company. I look forward to that day coming soon.

Thanks to the lads at Hartlepool for setting this enjoyable game up.

Saturday 10 September 2011

Nautical Birthday Presents

Subtle hinting and emailing an Airfix link brought about this first birthday hit. HMS Repulse in 1/600. A kit I "touched" in 1995 but decided not buy (and regretted), so second time around I didn't want to miss the boat (literally) again. I know Trumpeter have produced a nice version too, but the 1/600 Airfix version fits in nicely with the KGV 1/600 (aka HMS Prince of Wales) Airfix model I also have dating back from the 1995 era too. Perhaps subconsciously I am planing some sort of a "Sinking of Force Z" game in a local school playground/hall.


The second birthday hit was a eBay (store purchase not bidding war) birthday present bought for myself on the excuse of an older brother saying I had to "get something I wanted for myself". Mission accomplished with the Airfix 1/1200 "Sink the Bismarck" waterline model set (shown below). I can also blame Tim Gow and David Crook for this with their blog reviews, though if truth be told I didn't need that much encouraging at all.


I didn't have this as a kid and it was yet another feeling of "the one that got away". It also fits in nicely with the Revell Mini-Ships series I have, plus an eclectic set of "metals" (1/1200 or 1/1250) scale I picked up on eBay recently. Another bonus was that a benign Airfix "Packing Elf" included two packs of HMS Suffolk, which is quite handy (aka the RN, HMS Norfolk and HMS Suffolk Greenland Gap/Denmark Strait cruiser patrol pair). All I now need is another "pair of Tribals" for Vian's boys, but they seem to be over-priced on eBay (am I making an excuse for buying another boxed set?)

Well they are 'both' on the "winter projects to do list" :)

Friday 9 September 2011

Lost Wirblewind Found

There is a lot to be said for lateral thinking and a late night Friday night-cap of Hoegaarden beer.

(Note: It's powerful stuff so I just have "one" these days as a treat. I remember in my youth staring down at a circle of lemon floating in this Belgian wheat beer thinking it was harmless stuff, I'll have another and what the heck another for the road. Next day waking up my bed wondering where did the elephant go that sat on my head last the night? It has a kick to it, but I digress.)

I was thinking if my youngest did "file the Wirblewind" (see previous post) as part of one of his "learning games" it was not a certainty that the "bin" was used, looking around the room my eye was drawn to his clothing chest of drawers. He likes to put things in them from the back, I wonder ...

Not in the bottom drawer, but sure enough the middle draw was housing an under-coated  black, 1/72 ESCI Wirblewind as well a collection of stylish young man's (under 2's) jumpers. All I have to do now is paint it before he really does puts it in the bin!

:)

A happy ending to a horror story

Thursday 8 September 2011

Normandy Breakout Tutorial: Part II

"Advance", the German positions are revealed (prior to the artillery smoke coming down). Two German regular infantry companies and an understrength anti-tank PAK company (see below).


The Tommies advance into a maelstrom of defensive infantry fire on the right of the line, while the main push is shielded by the comforting smoke screen. Will I learn from past experience and remember to not "over-stonk" the smoke screen and shift the battery of 5.5 inch guns onto something I'd like to suppress? (Note: The British stands "left behind" were the organic infantry 6pdr AT platoons. Hitching them up to a truck and moving across the battlefield would have been suicide, so they became passive watchers of the assault.) 


The British infantry take hits and suppressions but hunker down and return devastating fire, shredding some of the defenders with rather lucky rolls. Note: I'd rather be lucky than talented any day of the week! However prolonged fire and a poor dice roll on a "status check" makes the British infantry go "defensive", which means the Battalion HQ cannot go closer the the enemy. The fighting stands have to stay within the ubiquitous 9" command radius.


The British Tommies press home on both flanks and an order mistake becomes apparent, to be revealed in the next picture (but on an up-side at least I remembered to shift one battery off the smoke screen, a lesson well learned from the previous scenario). The British armoured infantry battalion sends in the first two companies on foot (German infantry fire making some telling hits) while the battalion commander remounts the third company into half-tracks for a manoeuvre force. The tank regiment looks rather "idle" and unused at the moment.


My error in planning: I underestimated the success (or potential) of the right hand side infantry attack and ordered them not to storm the wood until the main attack went in. Their purpose was to soak off damage/attention from the big push (sounding like something right out of General Melchit's Black Adder Goes Forth) and not gain a foot hold and deny the enemy good cover. The British command and control is focused in keeping the the main attack (on the left) going despite taking fresh casualties, consequently the right hand infantry battalion remains 'defensive', happy to consolidate the ground it has taken. The ground scale means that the ground terrain isn't as open/flat as it seems on the tabletop.  

Can the attack maintain its momentum? The defenders are still "holding the line" but numbers must surely start to tell soon (or will it be one of those 'wargaming nights' when Lady Luck departs with a dirty look over her shoulder)?