I made an impulse purchase (well rather, I downloaded a Demo version - but the family unsympathetically call it a "purchase" as it resides on the computer) alongside getting a new family laptop, the Combat Mission Shock Factor 2 computer game. This is a new direction for me, as although I know of and have played previous versions of Combat Mission, they were all based in East or West front WWII. Not since a brief foray with a modern version of Steel Panthers (nearly twenty years ago now) have I played "moderns" [as in post world war two] on a PC (see below, a screen shot from the initial "Training Mission"):

Now as it happens I have, don't ask me "how" [as it is totally unplanned] the US forces and terrorist defenders courtesy of various random purchases over the years for the "training" scenario. So yes I have the four Stryker vehicles required and a Humvee (he says, quietly removing a 105mm recoil less rifle from the roof) in the "already" assembled "Forces of Valour" pre-made kit forms (so no gluing required here - although I ahem, I do have a box of "modern things to make" too). The US infantry force is perfectly matched to the contents of an old packet of Esci (yes that old) US Modern Infantry "modern as in Desert Storm" methinks - but that is close enough for me. The challenge is .. can I do them fast. They were already "based" on washers, and defensively coated in PVA to harden them up .. but the projects had stalled there for over a decade. I decided to quickly undercoat "spray" and then once dry literally dip them in my 'dipping tub' of Vallejo Sepia Brown Wash (see below - I was go quick I forgot to take a picture of them primed grey):
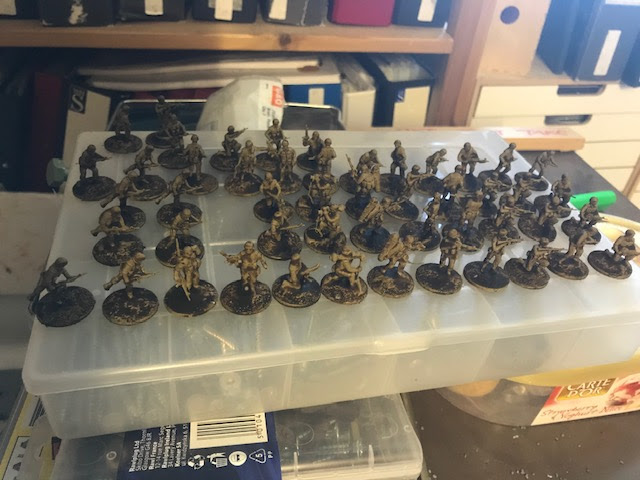
I want to "Keep it Simple" and just get this force on tabletop. So I am looking at wargame standard, not the three layer stuff I usually do - so grabbing paints to hand I started dabbling (see below, all lined up for painting inspection):

Rather than go digging through my Vallejo paints for "specific" colours I was using the Vallejo Game to get a close fit brown and experimenting with some Citadel paints that were lying around (due to a Covid-19 spare time house tidy-up by the wife finding my stuff is quite hard). Initially I was hoping I could dry brush my way through things but alas no. In the end I base coated a tester figure with Citadel Foundation Caltan Brown .. but did not like the results, so I used Valeejo Game Colour to give it a two tome highlight (shame I was hoping for something in one coat). Tallarn Flesh, another Citadel Foundation paint, was good for the flesh parts. Vallejo Game Colour Khaki was a quick fix for the bags (and I could live with that), but I hummed and ahh'ed as the diagram showed green and brown fleck camo. I gave in and used streaks of Vallejo Colour Cano Green and reused tiny dabs of the Calthan Brown Foundation (see below, remember .. I am trying to keep it simple to be done in one big batch):

The M16 weapon (?) gets a basic (Vallejo Game Colour) black (see below, my tester figure, I think I will call him "Frank"):

The question is can I spin out another fifty of these as quick or quicker?
2 comments:
Looking forward to this one.
Though, some of those ESCI poses still make me cringe.
Yes the poses are dated but I am trying to run through them in fast fashion to see if I can factory churn them out. I set myself a 48 hour limit but that seems to have been blow :( So it helps with me not getting drawn into teh detail
Spray and dunk was great but I could not dry bush as expected
Incidentally the "terrorist" opposition come from Caesar Miniatures and they are works of art
I will have to get some modern forces from their packs of these
Rather worryingly they come from China which indicates a strong wargaming, modelling market as I am sure they are not all for export .. although the packaging is for a Western market.
Post a Comment