I eagerly awaited the 2022 "Vintage" re-release of the Australian WWII "Panic Fighter" (the real thing was made from spare parts from aircraft available indigenous in Australia in 1942) as I remember "seeing it" as a kid in the Airfix Catalogue, wondering about it, but never going about getting it. There was always something more 'sexy' with crosses on it that took preference. A bit like the Fairey Battle and Brewster Buffalo, a missed childhood opportunity (see below, the CA-13 with original box art in all its glory, I bought it direct from Airfix when I picked up some resin buildings in their end of year sale):
All things said it is not a particularly complicated build, not many parts but I took time as I was in no particular rush (see below, it came together quite nicely):
If there was a scary part about building the Boomerang it was the canopy as it comes in three parts, the main bubble and two 'sliding' side parts (see below, I took time to make sure things fit well, the inside needed painting before the messy "Clearfix" came into use later):
The decals were very sexy, the Australian RAAF Pacific version of the RAF roundel, with the red bit missing as "anything with a bit of red in it, got a lot of Allied AA fire" regardless of what it actually was. All the Allied countries discovered the universal itchy AA trigger finger of their AA gunners to their own cost (see below, something satisfyingly distinctive with the missing red that says Pacific War we are fighting the Japanese):
Primed Airfix Acrylic Grey (see below, you may need to do a double take to spot any difference, but trust me there is a layer of grey paint there):
Because it is the way I do things now, the whole model got a Vallejo Dipping Sepia Brown wash coat (see below, the brown and green colour scheme seemed to lend itself to brown rather than black for leaving the detail "lined in" after putting on the base colour, I guess it is all about "painting less" rather than more):
Bottoms up, underside first. I wanted to use as close as I could to the original Airfix/Humbrol paint scheme and as luck had it I had Humbrol 65 (Matt Aircraft Blue) in a little penny packet paint pot from another "starter kit" which saved me a trip to the model shop (see below, the brown wash seems to be working nicely for the dark detail):
Starting the topside camouflage, first the brown (see below, note this is where I had to use the paint matcher site which said Tamiya XF-52 Matt Earth [4.5 stars match] equates to Humbrol Acrylic 98 Matt Chocolate):
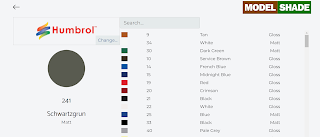
https://www.modelshade.com/paint-conversion-chart/humbrol/241Next the camo green part to complement the brown (see below, Humbrol Acrylic 149 Matt Dark Green gets matched to Vallejo Model 70.894 [4.0 stars but also a bit of confusion here, as the site matcher calls this Camo Olive Green - but my bottle says Russian Green, so I went with my 894 bottle anyway]):
Next: The white tail (Humbrol Acrylic 34) and black (Humbrol Acrylic 33) propeller - note the tips of the propeller were not painted black, but were left lighter to help the yellow paint stand out better, Alos the flight jacket was given a Vallejo Leather Brown base coat (see below, the little bits count as much as the big bits - I think I have also given the pilot some flat flesh on his face and hands too):
Next a highlight to the brown by mixing in a little yellow, plus the tips of the propeller are painted yellow (see below, I just wanted it to look a little blocky and weather worn over the panelling):
Similar yellow mixed with the green for another blocky highlight, I also give the pilot a highlight on his leather flying suit (see below, at this point I think the paint job is starting to come together nicely):
The tail gets a final white highlight which is just another coat of paint giving it depth to the prominent places, and neglecting the recesses, touching up with a brown wash. The cockpit glass is put into place using ClearFix - my least favourite Humbrol product as I find it very messy and stringy and I am odds to get it in the right places, even carefully dabbing it on with a cocktail stick (see below, fixed in place I leave it to set overnight):
Fixed in place the plexiglass gets blacklined (see below, by this point I am almost exhausted painting, so I go slow and carefully, absolutely no rushing):
From black to camo green and then a subtle highlight (see below, begging for the Australian decals to bring it to life):
The decals really make it look the part. However there is a sorry tale to tell here. As the Humbrol product I used, DecalFix reacted badly with the Tamiya and Vallejo paints, as in it stripped them away beautifully .. sadness gripped my heart. Now to worry I carried on and let the decals fix, then when all "well and truly dry" I painted round decals as best I could (see below, I think I got away with it; interestingly the subject of DecalFix melting Tamiya paints is well covered on the forums - I subsequently found out):
The underside, the only thing to add is the fact that I highlighted the Humbrol Aircraft Blue 65, with a Revel Aqua Colour, Sky Blue, then adding a touch of white for a subtle highlight of a highlight in places that just caught the eye (see below, tickle that tummy, which has a bulbous camera housing in it, dead centre):
The final act is a matte varnish (see below, Humbrol Matt Cote):
Bucket list item .. "Done" and I am very proud of it.


