Showing posts with label WW2 Land Rules. Show all posts

Wednesday, 11 June 2025

Note to Self: ASL Resource Link(s) and Third Time Lucky [Updated]?


Superb ASL Resource Link:

https://www.desperationmorale.com/

I know, it is like Groundhog Day, or a scratched record (again and again). Yes, I am going in again. Wish me luck or pass me the bottle of Jack Daniels, and yes I mix it with coke and ice. The ASL Starter Kit #1 is my way in (again). I have also ordered ASL Starter Kit #2 as well, because "you do need indirect fire" in WWII infantry combat. I was also looking (too much looking) at ASL Starter Kit #3, which brings in tanks, but the prices were/are just too crazy. ASL, sigh, like an attractive mysterious woman, perplexing. It seems so right until you start dating! It is not that the "sound of" the rules doesn't feel right - even "good" (when [or rather if] you managed to cram them all into your head), but it is that there seems so much to learn and options (edge cases) to remember, so you are left with the feeling of "have I missed something"! Which - is frustrating, but in the end for ASL - is that a bad thing, if it gets you there? 

Footnote: I have a theory. A lot of the ASL rules seem to stem from misuse of Squad Leader rules or dissatisfaction with unintended game effects. In the same way that the follow on versions of DBA (or its more complex cousins DBM, DBMM etc) were aimed at stopping "competition gamers" distorting the historical principle of the game, winning in "unhistorical" ways. Trying to maintain the historical realism and avoiding clever mathematical twists that inevitably snag rules.

Please see Bob Corderey's Blog Home Page (Wargaming Miscellany) - The First Rule and The Spirit of the Game on https://wargamingmiscellany.blogspot.com/ - top right hand side! I also want to run ASL with miniatures, 1:1 (they are company sized battles). Does that make me "mad and bad"? Because otherwise you forget what you are trying to model in the real world. I have a friend who invested heavily in 2mm blocks of troops and literally said it makes you stop trying to "wibble" when you realise the number of men you are trying to control!

Update I: Found this interesting blog/website as it describes ASL SK#1 - Simple Equation Scenario 3 was thinking of transferring to the tabletop (spoiler alert the attack was bounced and ran out of turns):

https://www.stallardhonour.com/a-journey-into-advanced-squad-leader/

Update II: Board Game Geek tutorial support (thanks to "John Y", see comments):

https://boardgamegeek.com/thread/157922/an-aslsk-tutorial-part-1

The Internet is a rabbit hole of ASL resources!

Friday, 1 September 2023

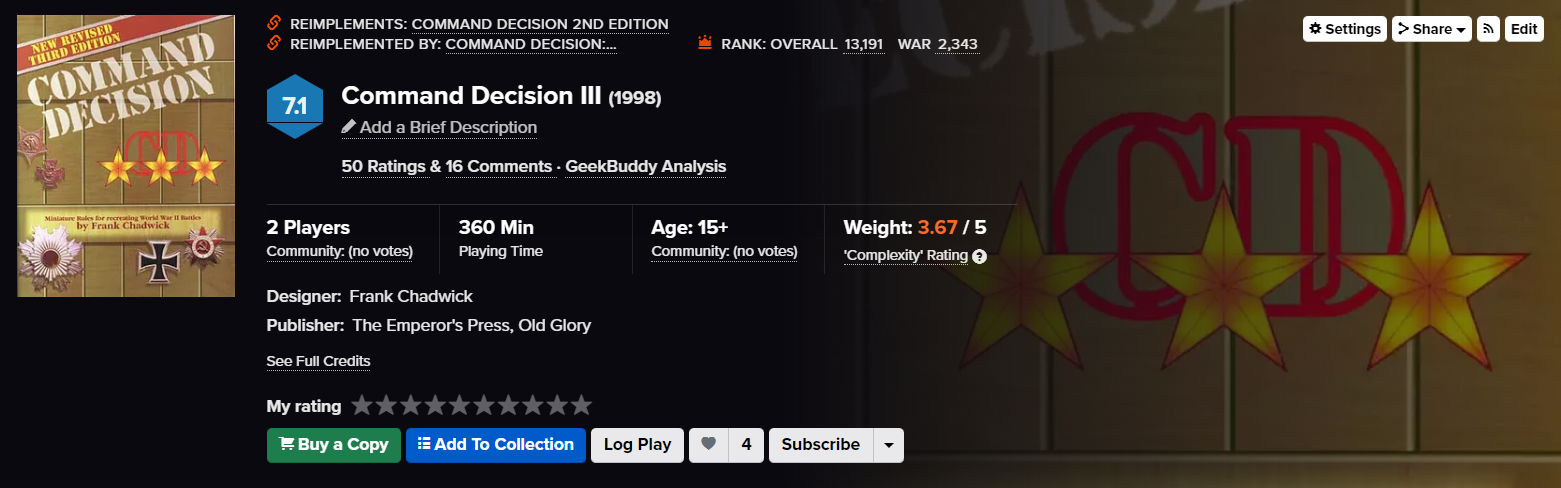
Benghazi Handicap - Command Decision - WWII North Africa Campaign Source Book [Including Command Decision Scenarios]

Sigh. I finally caught this one. Whenever I had looked for it before, it had eluded me - so when I saw a copy of it at Cavalier Books, I jumped at the chance (see below, Frank Chadwick's masterpiece on the early part the Western Desert War): 


This is my designated playground for 10mm play ground for Pendrakon miniatures, although I do have my old Airfix, Matchbox, PSC, Italeri/Esci collections of 20mm toys that can be used too. I am a sucker for the clanky tank era and this theatre of operation was full of them (usually in a state of burning).

Yes, Command Decision is back onside for me! In truth I never felt it had really left ;) 

Thursday, 10 August 2023

Good Blogger to follow: Shaun's Wargaming with Miniatures

Now this is an interesting recommendation from a friend (Game We Play). Something for the Ancient and WWII enthusiast: 


http://shaun-wargaming-minis.blogspot.com/

WWII  3x4 Advancing Companies Rule Set:

http://shaun-wargaming-minis.blogspot.com/search/label/advancing%20companies

Some time shall be spent investigating here!

Tuesday, 30 May 2023

Spearhead - Could it be the one? - WWII Rule Sets.

Could Spearhead, in its unadulterated form (shock horror), be the one? As in the "playable" WW2 set of rules I was after for all these years? (see below, if you are old like me you will probably remember this baby):


Intuitively it may seem to be a step back, as I remember all those wargamers I knew who had played Spearhead (and there are a lot from pre-2000, as it is an old rule set and was very popular in its time), who had enjoyed it but bemoaned the simplicity of the d6, so guess what - they introduced their own rule modifications (using d10s and some form of variation of morale break rules to allow remnants [as opposed to battalions break and disappear] like DBM to survive, but dwindle away giving token resistance). In fact I know hybrid Spearhead and Command Decision rule-sets were devised for 20-30 player Mega Games, as I have good friends who participated in them during the early 2000's. For one reason or another I too seemed to have discounted it, but in my greying years I see complexity  for the sake of it, over simplicity to be generally a bad thing now (increasing dice rolls and playing time for no real gain) and I am tending to go the other way, more focusing on decision making. I remember James Sterrett's quote, "All models are wrong, but some models are useful"). The above struck me as I was watching online some Nimitz games by Jom Owczarski and noticed he also did some Spearhead videos too (see below, the appealing bit being they are "double blind" with an umpire, which seems to be the magic ingredient and the secret sauce of success - let the players play):
I am intrigued to give it another go, in its basic form with an umpire (although sadly without the mechanical assistance of the Table Top Simulator magic). I also think it is best played below a divisional level, certainly with no more than two battalions per player. Watch this space ;) 

Wednesday, 17 May 2023

Command Decision IV - Test of Battle (To Be or Not To Be the ONE? That is the question!). First looking back at CD1.

For some thirty years I have been searching the hobby game stores for THE WWII "land war rule set" that will be the saviour, or rather my excuse for, buying my 20mm (and 1/200) wargaming collections (now 15mm, 10mm and 6mm need also to be included). Like a little lost soul seeking love and attention I yearn for the "perfect enough" set of rules to make me happy. In this quest "Command Decision I, II, III and finally IV (Test of Battle)" have been acquired - as has been the likes of Spearhead and Crossfire. Alas the bonfire does not burn as well as I expected - although I always thought Command Decision was almost right and crossing the Rubicon (its morale and its orders for command decisions, hence the name). Nevertheless the 20mm collection grows steadily bigger with each passing year, but few games have really been played on the sacred table top (see below, what the collective from Board Game Geek thought of CD1):  


Piquing my interest in WW2 land war recently were these posts: 

Has Sgt Steiner succeeded where I have failed for all these years? In fairness teh games get rated better with each edition (see below, V2, V3 and V4 ratings - so Frank Chadwick must have been onto something I think): 


For my own consumption I revisited the large stack of Command Decision boxes I have, containing therein the sacred rules and decided to do a play-test, actually going back to CD 1 (fondly remembering the day I discovered it lurking on the shelves of the Aberdeen Virgin Store, in the Games Section alongside boxes of Computer Games, thinking "now this looks interesting", as I thought then and still think so now).  

So I took CD1 out for a stroll, to show two of my wargaming allies some 1941 Barbarossa action near Kiev. I chose a 3:1 odds battle of a Veteran German Motorised Battalion from a Panzer Division versus a Green Soviet Infantry Battalion defending a couple of hills in front of a town, a real slap in the face job, but "only" using the organic German and Russian battalion weaponry. A full strength German Panzer Grenadier Battalion is easy 3:1 in advantage over a weakened Soviet Infantry Battalion. I thought he morale extremes should make it a relatively quick battle, just to learn the rules again (I expected the Russian force to melt, as it did). Rather than player versus player, as it was a very static Russian defence (one command order) and an active German (our command orders) there was much more discussion about what the Germans could and could not do.

Most of the issues on the day really stemmed from the difference between reading the rules and getting the gist, then playing a game and finding the reference to the right rule quickly when simultaneously explaining it to two other wargamers (there were too many pauses but my friends were patient). The game (IMHO) played well though, the order system was very representative of the capabilities of WWII forces although it played slower than the accepted 1:1 timeline [game time v real battlefield time] in the Designers Notes (something which I always though should be quicker in CD .. later versions simplified mechanics and tried to streamline .. maybe just a case of familiarity). I think I still need to convince my compatriots though, one a die-hard convicted "Avalon Hill Panzer Blitz rules in miniatures is the way forward", the other likes to see a few examples before making his mind up. Which is all fair enough.

I smile though as I thought it worked and I will tell you why, because the German plan was worked through the CD1 Order System, not as an after thought. No such thing exists in Panzer Blitz and many other rule sets. Two dismounted (that is from trucks) German infantry companies went forward supported by their own "company organic but dropped off" MG Platoons and the well-sited MGs/Mtr of the Weapons Company which punished the Russian defenders. The armoured half-track company was kept in reserve. For simplicity I had the defender's positions already spotted (assuming the Panzer Recon and Veteran Infantry Patrol had doe their job well the night before). A quick full advance and a cautious cautious advance allowed the Germans to fire in the General Phase. This melted away the Russian defenders on the two hills, causing as expected an adverse morale effect for the third Russian company, in the town with battalion commander and a infantry weapon stand (they hunkered down - pinned). One German company however stalled with a bad morale roll (in fairness it took the brunt of the Russian fire). The German reserve was released by their battalion commander while the battered German company regrouped. With over whelming effective fire power the Germans reduced the defenders and their morale broke on turn four, the only survivor - the Russian indirect mortar platoon - decided discretion was the better part of valour and legged it. To me it had an authentic feel to it. Like anything after playing the rules once (especially after so many years) re-reading the rules again ironed out a few queries. Introducing spotting is the next key, as bumping into stuff you have not spotted and dropping indirect on stuff you have spotted is another tactical feature of the CD system I liked! 

PS1: Apologies for forgetting to take pictures of the battle!

PS2: Most significant features I had forgotten about was extreme range for infantry was double normal effective range - which makes life  little more dangerous. 


Tuesday, 10 January 2023

Can anybody answer this strange Troop Type/OrBat Question from Command Decision?

I have recently been 'reinvigorating' my interest in my loft bound 20mm WWII collection, dwelling on the shame of knowing that I have a lot of 20mm kit without without a corresponding large number of battles under my belt. Wargaming "shame". This is something I need to address. Perhaps it is my choice of rules that is at the heart of the problem. I started my collection long before my Chain of Command skirmish interest when Command Decision was my bible (in the early 1990's it was CD I and CD II fresh off the press, post 2000, I picked up CD III with good intentions to do something with it, then quite recently, ahem as in couple of years [pre-Covid] I got a copy of CD IV 'Test of Battle' - for shall we say completeness sake). One of the troubles in getting tabletop is the [relative] 'considerable' amount of kit required for Regiment and Battalion OrBats in 20mm (let along thinking of doing a spectaular Divisional Battle - for which I would now opt for 1:200 [early war] and 1:300 [later war] figures, but then Spearhead is also an alternative rule contender). It is the wargaming butterfly syndrome in me and slow meticulous painter (rather than a ruthless "good enough for a tabletop game" finisher), combined with the terrible "lofty goals" and "ambition" (Arnhem - really?)). The paradox: I am both happy and unhappy at always being an "unfinished WIP". Life is somebody else's problem, it is the journey not the destination that counts.

So, the good news. I have been making progress and creating "battalion boxes" of 20mm formations. Starting with early WWII Eastern Front (1941-42) organisations. The basic idea is to get a German  armoured battalion and motorised infantry battalion together, then field it with some support companies to play against a (depleted) static Russian infantry regiment [three battalions and RHQ], with perhaps some scraped together support assets. It is also a way of avoiding "bundles of tanks and figures" rolling around in shoe and foolscap boxes in the loft, with the inevitable series of broken and missing plastic parts (see below, a German 1941 Motorised Infantry Battalion from a Panzer Division; multiple manufacturers [old and new] and various 'true' scales but all around 20mm [20mm, 1/72, 1/76, HO/OO] which is good enough for me - in this Amazon age we seem to be blessed with lots of suitably sized boxes):   


Now came a bit of a puzzle, a conundrum so to speak. As well as attaching in companies (such as armoured cars, motorcycles and tanks) from other battalions I wanted to also attach down stand to attach from higher level command levels, such as Regiment and Brigade. As it should be. That allows attachment of things such as the dreaded 15cm Infantry Guns and "the like". "The like" being an issue, as all manner of odds and sods exist in the Command Decision multi-verse (from USMC Raiders, Porter Stands, to Japanese National Service Militia Stands), which is great because they are mentioned in the rules as 'specials', or at least appear in Equipment Data Charts under Personnel, showing a "movement" or in the "Small Arms Fire" table with a combat value. To this end when I consulted the Frank Chadwick, Armies of World War II, Volume 1 (note, there never was a volume II) for early those Barbarossa units I was after, I was happy until I reached the German 1941-42 Motorised Infantry Regiments "level" in the Panzer and Motorised Infantry Divisions. 1941-1942. It appears there was a magical musical moment in the German Army in 1941-42? Not before, (1939-1940) and not after (1943-45), does this mystical "band stand" (get it?) appear (see below, perhaps it was a Germanic marching meme of the time? In total there are "three bands" in this Panzer Division OrBat, one playing for the panzers and two playing for the infantry - highlighted purple on the page. Quite a social itinery): 


So what is this "band" stand (that joke is wearing thin after the telling)? It comes along with a light truck as transport so its "motorised". I am puzzled, as I cannot "see it" in the rules. Without any additional mention that I can find, I am going to put it down as a simple "Veteran Infantry Stand" that is RHQ close protection (as it is not in italics which denotes rear echelon elements, so it is a 'fighting' element). If anybody has any other thoughts please let me know, otherwise I may have sleepless nights! I did consider a formation morale point loss if it was eliminated, but as it stands it can just beef up element count by one! 

Note: I have found references to the German Band in CD I, CD II, CD III (and I am still looking in CD IV).

Further Update: These musical Germans were also found in ..

  • German Infantry Division (1941-42)
  • German Jager Division (1943-45) 
  • German Mountain Troop Division (1941-45)
Back to my Tiger Tanks now!


Monday, 7 December 2020

Note to Self - O-Group Rules Design Concepts/Play-Through - Videos by Two Fat Lardies TV

Something (as in WWII Battalion Level combat) I am very interested in (as per a previous post) is the forthcoming O-Group Rules (from Reisswitz Press). Again quite helpfully the Two Fat Lardies have posted a series of Design-Concepts/Play-Through Videos of Dave Brown (author) gaming and example battle (see below, links and the typical core "battalion" which will get assets attached, which is the interesting 'battle group' level):  

Yet to watch them all the way through. Here I am again, stealing a trick off my children, as they can spend hours of their time watching other people play video games they are interested in for tips and tricks - to save them time! Old horse learning new tricks because the kids do it better ;)   

Sunday, 6 December 2020

Chain of Command - You Tube Videos on "How to Play" by the Two Fat Lardies

I know I have the rule book, but reading is not living the rules and it therefore so good when games designers also include instruction videos of what they are trying to achieve. I benefited greatly from re-listening to these classics to sharpen my "hard of thinking" brain which has a nasty tenancy to concentrate on Order of Battle and Support Lists (see below, many thanks for the Two Fat Lardies posting these as a "fast-start" and "nice-reminder" for myself and other wargamers who want to get into Chain of Command rule-set): 


Despite dating back to 2013 they were still well worth the listen for me. 

Sunday, 29 November 2020

O-Group - Reisswitz Press (WW2 Battalion Rule Set)

This caught my attention on the Two Fat Lardies web-site - a WW2 Battalion level set of rules in the making (see below, my thoughts are that the "battalion" is the natural "home of the infantry battle" centers in WW" - it is the soldiers "home" - you belong to a battalion, you are part of a Company and your mates are in your Platoon-Squad-Section, but all orbit around the battalion):

http://toofatlardies.co.uk/blog/?p=7958

It may also give me a home for the various 20mm pieces of kit I have acquired during my wargaming journey(see below, a Dicker Mac and a [unpainted] 75mm Infantry Gun from my WW2 German collection): 


Another set of rules I should perhaps look at is: "I ain't been shot Mum" by the Two Fat Lardies, which I believe is Company Level in focus (though I do not speak from any expertise here). Which leaves me with a triple of rules [O-group(Battalion), I Ain't Been Shot Mum(Company), and Chain of Command(Platoon)] ;) 

http://toofatlardies.co.uk/blog/?cat=14

Sunday, 13 May 2018

Getting ready to be a "Lardie Tanker"

In frenzied preparation for The TooFatLardies "What A Tanker" rules I have been assembling the 15mm tanks I had bought for no apparent purpose and left them in the loft. Hence I find myself making a PSC "Fury" (see below):


A PSC Panther Ausf G (see below, I am setting myself up for a late war clash [Note: The message on the tray is a note to my daughter who likes to 'play' with my paints ... or rather ruin them .. to please "stop"]):


The formations of three are forming up (see below):


The disparity between these medium tanks is 'stark' (see below, the Panther is a Fast Heavy IMHO, also see more of my "stop playing with my paints message" - it seems to have worked! I also gave her a set of my old paints as she actually is very arty):


Good luck Yanks this one looks a hard job (see below):


Nine tanks thrown together, yes the Matilda II's are not interested in playing with those Panthers (see below):


The kits are fast, neat and nice to make and I am just wondering why I didn't get into 15mm before and persisted with the 20mm obsession of mine! Let's not go there, I am just collecting everything now ;)

Thursday, 5 April 2018

Command Decision "Test of Battle" CD4 (or rather CD4.1)

I knew it existed but I had never bumped into it at a show or wargames show and by the time I tried to buy it on-line it seemed to have 'long gone'. So I kind of snapped it up when I saw it advertised on eBay. Reading the bumf I see that it is officially termed Command Decision 4.1 (dated as 2012) because it is a re-edit of the first production run. Good enough for me (see below):


Glimpsing through it says there is lots of extra stuff to download from the web-site (stats charts and scenarios). A few of the core mechanisms I was happily reading about in CD3 seem to have been surreptitiously dropped. In no particular order. Turn time seems to have gone from 15 to 30 minutes. Rather than number of hits to kill it seems better troops are harder to kill. Spotting goes deterministic. Artillery suppression rather than casualties is a "new" concept.

All I want to make sure I "play some games with it" rather than just add to my collection of  wargame rules ;)

Saturday, 11 June 2016

Airfix Battles Wargames Rules: First Look

I completely forgot that I had treated myself and signed up to a pre-production order of Airfix Battles (see below):


Unboxing later but the shiny factor of all the original Airfix artwork is a huge, huge plus. My one comment would be that it seems to be scaled at 15mm rather that Airfix HO/OO or 1/72(ish). Not a problem for me as I have just acquired some 15mm WWII kit ;)

The counters look very useful and I am looking forward to skimming through the rules.

Monday, 1 July 2013

Battalion attack - Fire and Movement (1944) : Game 2

Return to "Battalion Attack" - Fire and Movement project (from Phil Sabin's Simulating War book) got a second outing. See below for the revised terrain board, with the British Infantry Battalion (1943-45) attacking left to right, hits a German defensive line of two companies. This is a hasty attack scenario.

The British start in the left most column (Germans setting up in columns 4,5 and 6). My acquisition of "brownish "Lego (TM) pieces from a trade with my eldest son has enhanced the look and feel of the "Farm Complexes" terrain sections. A certain familiarity with the board (second time out now) also allows me now to nickname certain features.
  • Top left hand corner, "Little Gibraltar" (the only British held "Farm Complex" at the start of the game)
  • Top right hand side corner, "The Alamo" (the German 'retreat' bastion)
  • The top centre, "The Iron Crescent" (German held/dominated defensive lynch-pin of this sector, comprising of three farm complexes, one ridge and two sections of woods)
  • Bottom right, "Outcast Wood" (home to the German left flank platoon, in a similar role to the 20th Maine at Gettysburg, "You sir are the left flank")
  • Bottom left, "Overhang Ridge", (a superb British HMG baseline position situation ideal for 'overhead fire' on "The Iron Crescent")


'Putting the toys on the board' (as per the Simulating War "example of play pp215-219, see below). The book play through was a good training session for the two newcomers (but experienced wargamers and board gamers) I umpired for. They took up where the book left off.

Note: The figures "off table" (in the black non-playing area) are:
  • To the left hand side the British off-table three inch mortar support platoon
  • To the bottom, the German replacement counters for any platoons that move out of their dug-in status. Also to note all fighting rifle platoons have been given a 'company colour' sticker for ease of identification (which is important in some firing circumstances). The platoon number has been dropped as insignificant to the rules).    

Another 'improvement' to the terrain from last time were the 'new look' ridges. Instead of being another layer cardboard tile I used a magic material called Dufaylite (TM) which is a cardboard honeycomb (think "bees" hexagonal honey cells) used as the filler in a thick cardboard sandwich. The beauty of it is that the material is that it can be cut with a hand saw into hexagon shapes. Then the hexagon sides can be easily sculptured into slopes with a bit of pressing, snipping and gluing (a cheap glue gun helped here) up to a small plateau. Finally  painted and flocked (see below for the "Overhang Ridge" HMG position):.


The emphasis I place on styled terrain is intended to 'better' represent the terrains impact on the battlefield. For example when I used the plain brown hexes for "farm complexes" in the first game I felt that it unintentionally mislead the British player into thinking that "the attack prospects" were much easier than they actually were. I thinking by making the terrain look more formidable this important balance should be somewhat redressed.

The Second Replay

Despite Battalion Attack - Fire and Movement being a "short game" we only managed to play eight full turns, filled with wargaming discussion. The situation you see below is at the start of Turn 9 (as in the German player goes next).


Game summary: Coached to a certain degree as regards what had happened in the first (experimental) game, I think the players made a decent stab at playing the game as to how it was intended to be played. It also helped that the fire combat modifiers had been better clarified on the Simulating War YahooGroup. The rules now played correctly (in the first 'experimental' game the Germans benefited from additional defensive modifiers that were from misreading the rules) gave a much more fluid game.

Review of Tactics: The British battalion commander decided to press forward with an infantry close assault on "The Iron Crescent" despite the daunting nature of the task. His slow methodical progress paid off to the extent of clearing the furthest forward "farm complex" and inflicting one German Platoon casualty (the one the Germans had decided to 'advance into during the first two turns of the game). "Outcast Wood" was largely ignored but nevertheless was a bullet magnet as the British commander fell for that old wargame adage of "use what you have got while you have still got it". The result is a cumulative frittering away of assets (every seventh shot eliminates a friendly platoon through ammunition attrition), no one attack being the deadly sin, but the net effect is a poor "fire discipline". At the end of turn eight the German baseline was still looked a very long way off, the Germans still at five sixths strength and the British down to half half combat effectiveness (six rifle platoons and two support platoons). The defence looked like it might be bent but not broken. The German player "hung tight" and committed his reserve platoons to "strengthen the line" at the moment of crisis and I think he was heading to win as the British commander was gradually "running out of infantry". 3VP to the Germans and only 1VP to the British. Who had the idea of attacking this sector without tanks?  


The Rules Re-examined (again):

One feature of the Fire and Movement combat mechanisms (i.e.the ammunition attrition and direct fire casualties) is that the attacker can "bleed from the back," with more often than not the attacker being able to selectively choose what platoon dies (and not necessarily being the unit being "hit" the most). This allows the attacking player to 'keep the momentum going".

Another rules feature was the incredible usefulness of the HMG (especially in indirect fire mode) and the battalion mortar in providing covering fire for the infantry attack.. The former is particularly useful as a well sited HMG (on a ridge) can provide some covering fire (albeit with a negative modifier) 'danger close' whereas the mortar has to 'check fire' due to 'adjacent friends'.

One thing that became clearly apparent was that "dug-in troops" can be relatively easily suppressed but not KIA'ed. The designer notes this as a deliberate feature, something that a lot of miniature rule sets do not follow, the classic being Squad Leaders 'breaking' broken units on a second hit and the tendency of heavier shells "Verdun'ing" infantry (Command Decision and Spearhead).  

Finally, to make any headway the British player has to pay the butcher's bill and get some rifle platoons into a Close Assault position on the German occupied "fortified/covered" hexes (i.e. the farm complexes and troops dug in woods) as it is the only way to score casualties on the Germans

Addendum:
Wow, bit of a big "brain dump" of a post but I think it was worth it ;)

YahooGroup and this Posting can also be found at: 
http://groups.yahoo.com/group/simulatingwar/message/1992 

Saturday, 11 May 2013

My First Game of CrossFire: 1944 US (attack) versus Germans (defend) Opteroon Crossroads (Part I)

CrossFire and me, the background:
I had been waiting for this moment for about ten years. The copy of CrossFire had lain dormant for that time half read (a couple of false starts) but with 'no other interested parties to play with' it seemed an exercise in futility in getting 'half into' yet another rule system (despite intriguing comments passed on to me through various sources of its novel style of play). I had played an enjoyed Spearhead (an above battalion and Divisional and below 'level' of game [typically using 1/200 and 1/3000 toys]) by the same author, so CrossFire seemed to hold great potential to me (from platoon up to battalion level) for a 'practical' use of my collection of WWII 20mm kit (originally gathered together for Command Decision but after much soul searching I came to the conclusion I did not like the aesthetics of the ground scale, in extreme cases of AFV combat you could get a Tiger tank touching a Sherman "barrel-to-barrel" resolving fire combat, but to me it looked like "ramming" combat). So it came to pass, when of an offer of a game came to me by email I decided to "jump in and fill my boots".

Chosen randomly (the coin came up heads) I played the German (Americans attacking top down to the bottom of most of the photographs, eagle-eyed readers will see the line of barbed wire and minefield [strung across the road]) that denotes the German front line. Continuing with the Umpire's narrative ............

Somewhere on the Belgian border, November 1944
 
The US Briefing

"The shelled out village of Opteroon is wreathed in winter morning mist. Lt Stott of C Company, 334th US Infantry looked carefully at the village, noting the belts of wire separating his forward positions from the unseen enemy. Stott had been ordered to make a Company attack on the village. He had a Sherman tank in support. Last week a platoon from B Company had been overrun by a Tiger tank, and the concerns about German armour meant he had brought extra Bazooka's "just in case"

Stott deployed with all three platoons on the line. His plan was for Third Platoon to hold his left, while First and Second platoon assaulted the large building in the centre of the village. Everything in place, he gave the signal for the Company mortar to begin laying smoke........"

The "Yank Tank" M4A1 (105mm) Sherman (see below) makes a statement, being brought up to support the US infantry attack in the centre of the village (the heart of German defence, the very crossroad itself, a very bold move).


The German briefing: 

"Lt Lange of 2 Kompanie 2nd Battalion 351st Grenadier Regt wished he could stay warm. He was tasked with holding Opteroon crossroads. He had a Company of Volksgrenadiers, with two more platoons of Volksgrenadiers in reserve. He also had a pair of MG42s and his company mortar, plus a single Pak 40 anti tank gun. He was worried about enemy tanks as his men had no other anti tank weapons. His troops were a mix of young boys and old men, stiffened by a cadre of veteran NCOs. He had deployed one platoon in the large building in the centre of the village, a second in the woods on the right, and his third in reserve at the rear left. He had his Pak40 emplaced in a wrecked house which covered the crossroads, one MG was positioned in a building covering the flank and rear of the central building, the second in a house covering the left flank. "

He set his HQ up in a building to the rear. (Ed's note: I didn't say I was going to be brave)

The Germans possessed only one weapon capable of taking a Sherman on at distance, the venerated Pak 40 75mm Anti-Tank gun. In gunfighter style it faced down the Sherman (see below).


2Stotts mortar fire woke everyone. The Sherman advanced up the road, covered by the smokescreen. First platoon opened suppressive fire on the large building.

The Pak crew manhandled the gun around to cover the approaching Sherman, but the Sherman fired first, and sent the gunners diving for cover. The Sherman then switched to fire on the large building, suppressing some of the defenders. Second platoon broke cover and charged towards the building, and then it went wrong........ "

The panoramic view of the battlefield. From this angle the Americans are attacking left to right, the dividing line going down the slightly left of centre of the village, behind the line of barbed wire and mines (see above). The Sherman tank can be seen top left driving down the road (see above).

Note: All the above kit is 15mm from the Umpire and American players vast collection

Next: All Hell Breaks Loose
The CrossFire initiative sequence of play comes into its own

Wednesday, 16 January 2013

A Battle to be Played: "Over and Over Again"

This is my WWII (land) project for 2013. 

It is a battle scenario based on Phillip Sabin's "Fire and Movement" game in his book Simulating War. It does not require that many figures or a particularly large board. In many ways is resembles the "portable wargaming" craze that has been sweeping the varios CoW (Conference of Wargamers) blogs (for example see Bob Cordery's blog "Wagaming Miscellany").

The scenario Phillip Sabin's poses is of interest when I think back to the mid-1990's when I was feverishly collecting (at that time exclusively 20mm) WWII toys. I was left with an awful sinking feeling that after I had painted and based them (at that time for the Command Decision rule set, a project that in itself is still "not complete" and an active never ending Work In Progress [WIP]), I still didn't or wouldn't know what to do with the "toys". Not just the mechanics of the rules (hard enough), but a sensible way to set things up. Yes there were scenario's ... but did they really make any sense? What for a battalion's purpose was a sensible sort of fight (and yes I know war is not fair).  

By this I meant "What was a realistic battle scenario" in terms of space and time?". What was a common battle the rules were meant to control and simulate. All the 'command and control' commentary in Designers Notes describing commanding Divisional strength table top formations (which I personally is over reaching Command Decision) didn't help me nor did the interesting aspect of rates of fire. I needed a simple scenario to blood myself on infantry combat.

The Scenario:

A infantry battalion is on the "attack", against a half a battalion of infantry under "hasty defensive positions", as in using cover rather than entrenchments. The attackers are a full strength whereas the defenders are deemed under strength (roughly 2:1, 13 attacking stands to the defenders 6 [all stands representing platoons]). Good or lucky intelligence has directed the attack against a sector that "should give" or "could hold" depending upon the tactics and skill of the attacker (plus a bit of "lady luck"). The defenders are trying to cover a kilometer wide frontage and can call upon an indirect fire base (medium 81mm mortar) while the attacker has the luxury of an initial artillery barrage (25pdrs or 105mm howitzers), then a mortar and indirect machine gun fire bases. The additional support assets seem to tip the odds in the attackers favour but there is a large random element of "battlefield terrain" creates a good deal of uncertainty (as it is generated new each time). The duration of the attack is deemed to be abut "two" hours which translates into about 12 x 10 minute turns. The "board" is twelve hexes wide (the kilometer "battle zone" of the defending battalion) and six hexes deep. The determination of victory is determined in an attritional manner of "unbroken" units on the enemy baseline at the end of the twelve turns. Thus it is assumed that the full battalion "should be able to dislodge" two companies out of 'hasty positions'. .

Starting from this more board-game orientated description I plan to take "the scenario" for a long walk, starting with Sabin's rules and then through the various rule-sets I possess, varying nationalities and periods (early, mid and late WW2). Initially from Simulating War the attack is envisioned to take place in 1944, Normandy/France, with a British Infantry Battalion advancing against a composite, scratch force of German Infantry, reduced from an initial battalion and supplemented by "a series drafts" of replacement sections and platoons that 'keep making up'the numbers up.

Kit to use:


The battles should be suitable for my: 1/300, 1/200, 20mm, 1/72 and 1/76 toys (but not all at the same time), heck I might even start things off with my old Squad Leader counters

Rules to Use (Initial List): 
  • Fire and Movement (Phillip Sabin)
  • Command Decision II/II/I
  • Spearhead
  • Battle Group Commander 
  • CrossFire
  • Great Battles of WWII
  • Squad Leader
Watch this space ...


Monday, 18 October 2010

France 1940: Battle of Crehen: AAR Summary

I followed with fascination the NZ (Paul from Plastic Warriors and Al from Twentieth Century Wargames) Command Decision 2 scenario of the Battle for Calais 1940 (and I am very much looking forward to its forthcoming conclusion). Partly out of my own interest for the period and party for the fact that I was also finally getting round to play a similar game set in 1940 (after many years of collecting the kits in 1/200 scale). French v Germans in Belgium set in the opening days of "Case Yellow" set around the village of Crehen.

The Scenario:
The French are faced with a delaying action, the Germans are pushing forward as fast as they can without the usual artillery and air support. Recon (or death) by contact and a Panzer battalion hits a mixed force of French (Motorised Infantry - Dragoons and their integral armour support) trying to block their path.

Who will prevail?

An excellent After Action Report (AAR) has already been posted to the BattleFront Forum (see below). Well worth the look as it contains different and far better quality photographs than this post. Plus an impartial review from an official umpire ;)

http://www.fireandfury.com/phorum5/read.php?2,42898
(Click on AAR in the posting to go to a rather large document, but well worth the read)

In Summary:
The Germans thrust through the middle and were horribly ambushed. As a riposte to this the Germans tried to out flank to their left and were again horribly ambushed. In an attempt to drive past this resistance they impaled themselves one the final French defence line and "broke a company" (see below - middle of Crehen is at the top of the photo, the field of burning German tanks being the French right flank).


The stragglers running in panic off-board (suppressed and disrupted) to the amusement of the French (see below).


The Germans tried to outflank right, suffered casualties but pushed the French back (who tried to use a smoke screen [white card in photo] to cover their withdrawal, see below).


The Germans initial success stalled as they met hastily re-deployed French reinforcements from the victorious French right battle described in the previous photographs (see below, stopping the Panzers, French tanks have firing positions off-camera to the left).

 
A stalemate ensued and the Germans tried to force the issue with their third medium company of Panzers which start hurting the French tanks. Tank carnage ensued as French tanks started to hurt and burn in a one for one exchange that the Germans could afford, the French not.


However during this exchange the German second light company suffered one too many losses and broke thus stalling the Panzer battalion and gaining the French their victory conditions (i.e. the best French outcome of an "orderly retreat" not rout - sums up France 1940 really). Note: The German medium company PzIII's and PzIV's were untouched in the exchange, which was something disturbing and a point to watch out for in the follow on battle.

Photo below shows French tanks redeploying from their right flank to their left/back as a final "Alamo" defence line. 


It had been a tight run thing and the French just got out of Crehan before being surrounded (see below as the infantry transport safely extract the Dragoons despite the attention of two cheeky PzI's). Of note, I have also never seen so many German tanks burning on table in a wargame before, over 50% of tanks committed were knocked out!

 
The game was played over two successive nights at the venerable Hartlepool Wargames club in the north of England using Battlefront the WW2 rules (if I say I think Command Decision gives a Battalion view of a battle, then I think Battlefront scales down to the Company eye-view; Note: my own opinion). This is a set of rules I have possessed for many years without actually playing/reading them. Luckily I was in good hands as several of the club members are active contributors to the Battlefront Rules forum and know the rules inside out. As the BF "virgin" I was given the job of commanding the elements of French 3rd DLM tasked with stemming the German tide, the more experienced Battlefront player (Paul) commanded the forward elements of 4th. Panzer Division.

The Wargaming Team:
My gratitude goes out to the Hartlepool Wargame Society regulars involved in this game. Ken for compiling the AAR report and umpiring, Andy for the scenario design and umpiring (yes two, we were spoilt with a 1:1 players to umpires ratio!) and Von Paul for being my erstwhile opponent despite coming off a horrendous twelve hour shift pattern (the fatigue factor which some could say was shamelessly exploited by the French). It goes without saying that I am looking forward to the follow on scenario and to see Paul's thirst for revenge after my bit of "beginners luck".

Figures Footnote:
Although I like (and am basically addicted to 20mm modelling, see 20mm blog entries) I have a love-hate relationship with them on tabletop. For "infantry" battles I like the scale, however for battles that bring in swathes of armour a Panther and a Sherman barrel to barrel leaves me cold (that being the worst case depiction). It is that dreaded scale versus visual presentation thing, hence I have a second preferred "armour wargaming scale" for WWII. For early war I see 1/300 (or 1/285) as too small so I chose (maybe just to be odd) the 1/200 range from Skytrex. In fact I am happy mixing 1/200 vehicles with 10mm infantry (Pendraken). For latter-war WW2 I intend to use the more conventional 1/300.

Monday, 14 September 2009

Plastic Infantry: I know I have to go there

Now that I've seen so much well painted 20mm plastic infantry on the web, I know I will have to do some of my own. Heck armour needs infantry support. I'll probably start with the German Infantry Revell kits as (a) I have a lot of them and (b) they are well detailed, good poses and are hard plastic. See the "Naked and the Dead" below (I'll also have to work on my small scale figure photography):


Going left to right we have in bare plastic we have two figures of each:
  • German Late War (Ardennes) Infantry
  • Summer Panzer Grenadiers (Stalingrad)
  • German Late War Assault Engineers (Ardennes and on to Berlin)
I'll have to do a little more digging on the web and particularly into other people's blogs to find out the best ways of mass production painting, as we are talking 50+ figures here. My initial thoughts concern preparation, hot soapy (detergent) water then do I take the hardened PVA route but lose some detail or keep teh detail and try and bind it under several coats of varnish (gloss then matt)?.

Any advice or info links appreciated.

Sunday, 13 September 2009

What (WW2 land) rules to follow?

Despite some twenty years of 'punctuated intensity' in the wargames hobby, dominated but not exclusive to the twentieth century (and again in particularly WW2) I have yet to find my ideal set of wargame rules.The concept of "set" can be expanded to include, scale of the models (20mm, 15mm, 1/300, 10mm, 1/200 etc.), the tactical/operational level of engagement the game would represent, the timescale of turn and the simulation versus game mechanics employed.

Yes I have lots of sets (in the purchased sense), but many have not made it to actions on the table-top. Those that keep coming to mind are defined as the "good", the "hopefull" and the "sinfull". All my own personal views of course, and in no way a criticism to those who enjoy a different way/taste to mine in the hobby.

Some "good experiences" of the ones played so far have been:
  • Spearhead (and modified versions thereof, played with 1/300 or 1/200 kit, a fairly large sized battle of three to four battalions a side can be concluded in a club-night)
  • The Command Decision Series (to be accurate mainly WW2 Command Decision Version 2 but Version 3 is in my possession and has been read, played originally with my 20mm kit although I am planning another go with this set using my 1/200 kit, provides a battalion/regiment intense slog-it-out feel to a night)
  • Hell by Daylight (participated in various excellent 20mm Skirmish level games, always fun and leaving a feeling of authenticity in the mouth)
  • Squad Leader transferred to tabletop (can work well, but mainly with those who have already played it as a board-game, it can frustrate gamers not familiar with it and the infamous Stalingrad scenarios, again with 20mm kit)
Those "hopeful" sets yet to be tasted/tested in the heat of a club battle:
  • Battlefront (of which I have high hopes to use 20mm as well as my 1/200 kit)
  • (Canadian) Great Battles of World War Two (which looks to have some great concepts, probably using 1/200 kit)
  • Crossfire (which again looks to have good concepts and works for a good many people, a good 20mm prospect, particularly inspired by these chaps Tim Marschall and Lloydian)
  • Megablitz (well a few 20mm tanks should stretch a fair way in the OoB here, a very high level way to run a battle. Not a case of where are my squads but what are my battalions doing?)
Those "hopeful" sets yet even to be purchased:
  • Nuts! (skirmish)
  • I Ain't Been Shot Mum! (Company)
  • Flames of War (although very popular something tells me I shouldn't hold my breath on this one as I keep seeing it mentioned in the "points" competition sense, though their production quality seems excellent, so popular in 15mm, but a maybe for 20mm)
Ones that suited me not, as in they have "sinned" IMHO, or failed the 'wargaming environments' in which they were played in or perhaps personalities/style involved:
  • Rapid Fire First Edition (which had a notorious nights of wanton death that sealed its doom at several clubs I have attended, artillery being a notorious talking point)
Nevertheless the search continues for that "perfect" set. Visual appeal is very important for me, hence my drift away from Command Decision 2 in 20mm as the models in some cases seemed almost touching (in extreme cases, platoons of tanks almost in hand to hand combat) and it didn't carry the realistic visual feel across to me.

However my recent 20mm painting may make me reconsider this due to its modelling appeal. :)