Sunday 29 July 2012

Those Pesky Persians and Carthaginians

The Early Achaemenid Persians: 

Even though DBA armies are "small" in figure footprint, Early Achaemenid Persian army is one that 'wants' more than most with 4 x 8Bw and 1 x 7Hd included in its army list (see below). You have to paint a chariot and plenty of cavalry too. It spans a goodly distance with its 'twelve bases' not doubling up in hoplite rear rank supporting fashion. The eye to its success is the its of its cavalry arm and choosing suitable defensive (aka protect in 'rough') ground for its 'archers'. It's quite a challenge for the Persian player (Xerxes) as you feel the natural 'Greek' tendency would be to 'stop your internal squabbling' and to gang up on him. At least he will start the campaign holding the 'strategic' central province of the DBA campaign map (to be included in a future post), in this case a sea area of Central Mediterranean Islands and also has a safe 'edge of the world' position. I still feel they will need some campaign special rules to help 'up' the size of the army and/or cause disarray in the Greek forces. The collection below are from Xyston Miniatures, beautifully detailed and being Persian gave me the opportunity to use a 'full' paint palette of bright colours.   


Early Carthaginian:

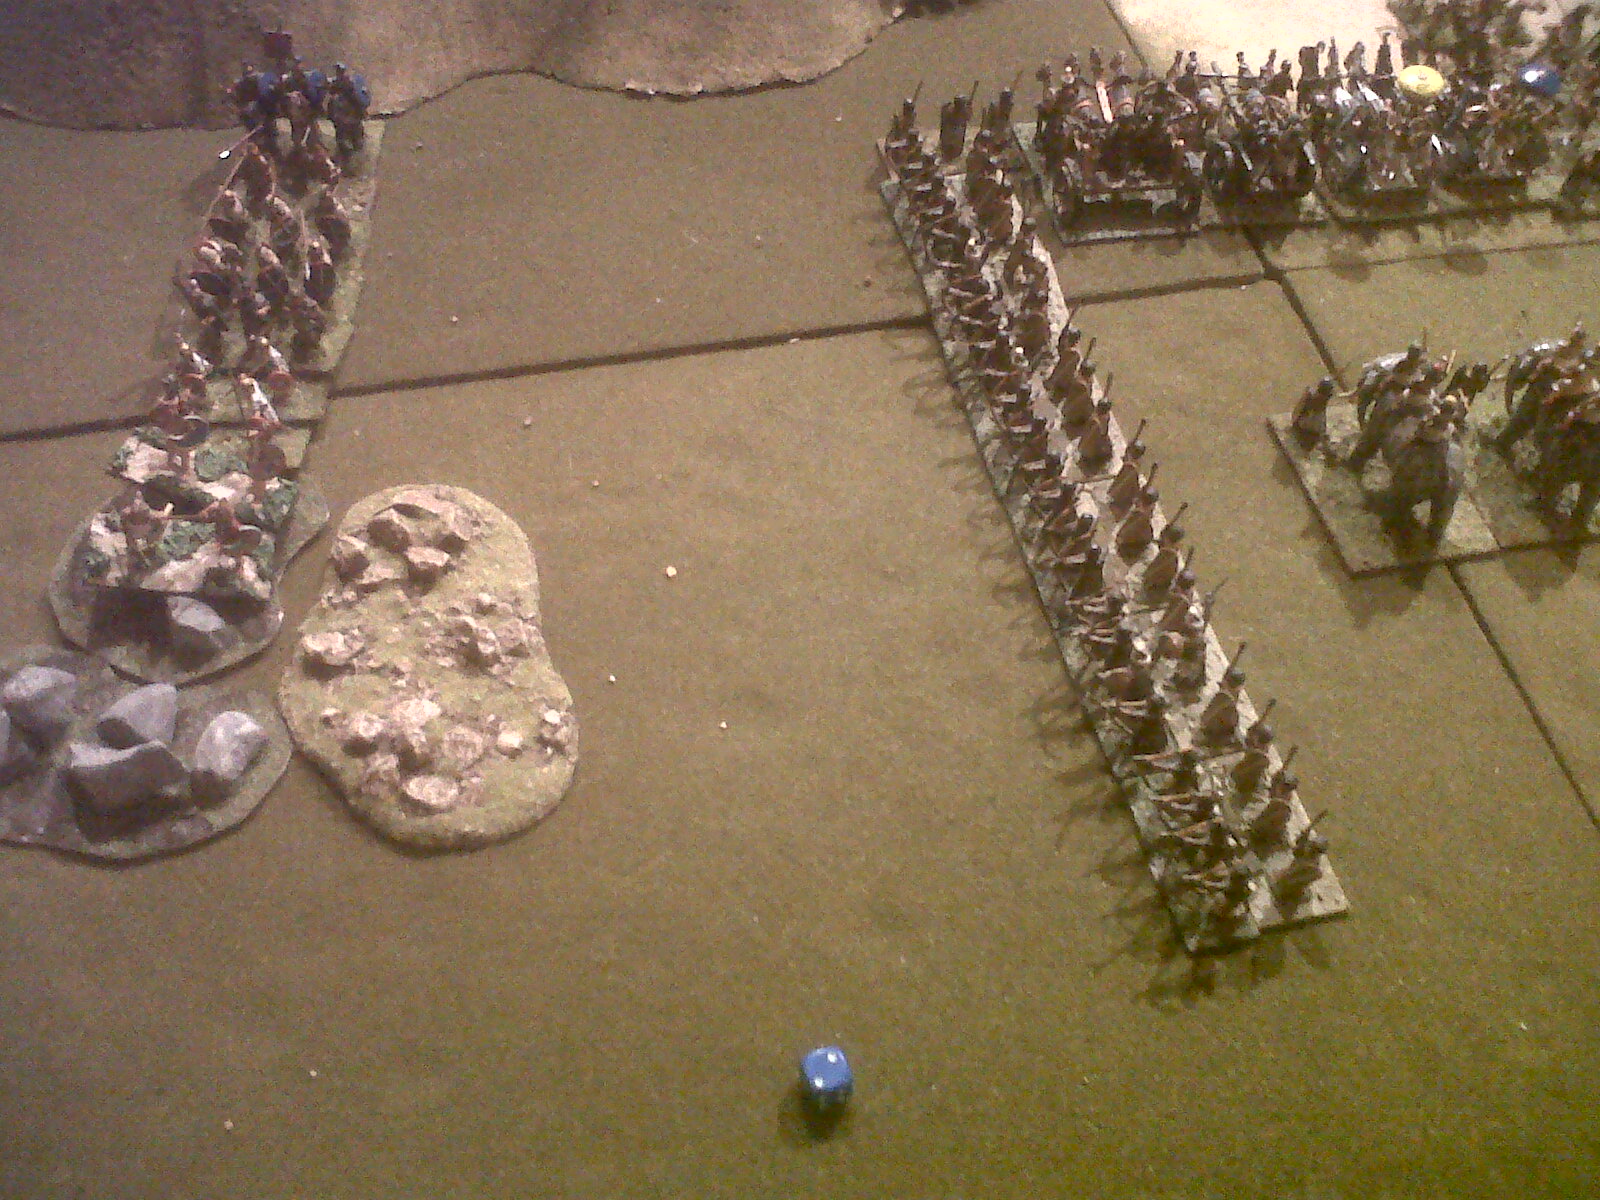
A lesser known player in the Greek-Pesian Wars, but (probably) a pro-Persian ally to the Achaemenid cause (courtesy of the common links to the sea-faring Phoenicians). It's main input was too make war with Syracuse and the rest of the Sicilians under Gelon (see previous post), while Xerxes stole into Central Greece. Hence no Greek reinforcements from the Western Mediterranean. The Carthaginians did not have any elephants, but they did have an interesting mix of mounted, including Heavy Chariots/Numidian Lights/Cavary, and foot including spears (from African Spearmen to Citizen Militia, take your pick) and lights/auxillia in support (see below, bottom of the picture). Not to be underestimated. Their weakness is the fact in campaign terms they have to cross a lot of water before they can get involved and sea crossings in ancient times were risky undertakings. My Carthaginians all come from Museum Miniatures.


Persian reinforcements standing off table for those 'what/if or campaign special rules' (see below). All I seem to be missing for another two Early Achaemenid DBA armies is a bunch of 8Bws, about eight stands in fact. Given my current painting rate they could be a long time coming!


The prototype Persian camp (see below). All I need do now is select and paint a stand of camp followers to fit inside it.


The core six DBA 'Greeks in Peril' campaign armies are shown all together in a long camera shot (see below):


Next: Formulating the pros and cons of the Greeks in Peril campaign.

Tuesday 24 July 2012

Greeks in Peril : Good Guys?

Men in Skirts:

Following on from my reading I mustered my long standing 15mm Greek collection into a semblance of City States for inspection. As per the original intention they are in DBA army format (twelve elements and their alternates). Note: Apologies from the relatively distanced long camera shots.

Athens: Mostly Xyston Miniatures, bar the Cavalry which is Chariot Miniatures. I do have the requisite mounted figures in Xyston, but it takes me a long time to paint their 'sculptures' as a good thing deserves not to be rushed.


Again Athens, this time a close up of Athenian hoplites (see below). These shields are awaiting application of the "Little Big Man" 15mm shield decals (some things don't change no matter what period I do, decals always have and will be my bugbear).


Sparta: The hoplites are from Chariot Miniatures, while the "hoard" are a mixture of Xyston Miniatures. The hoplite line has far too many officers (with their traverse crests), I will at some point have to break them out mixing them with the normal rank and file. Painting the horse hair plumes a mixture of white, red and black will help the appearance too. They also need the application of the "Veni Vidi Vici" lambda decals (no surprises there then).


Thebes: "Ooooh" gasps the crowd in pantomime horror. Greeks in alliance at the start of the invasion but they were (historically) the first to turn and go over to the Persians. Understandable when you consider that the line of Greek defense in Attica meant that their Boetian lands were left for the Persians without a fight. Even more ominous is the fact that I have managed to apply the "Veni Vidi Vici" decals (the white club of Thebes) to them. These figures are from Irregular Miniatures and despite their relative cheapness in comparison to other manufacturers they paint up extremely well. In fact I may safely say these are my favourite hoplite figures to paint. 


Sicilian Greek: These boys historically never made it to the show being distracted from the main party by a different 'invasion' from the neighboring Carthaginians (paid by the Persians to cause mischief). Gelon the Tyrant of Syracuse (tyrant  being more a term describing an ancient 'undisputed' king rather than out and out pure baddie, Gelon in fact was recognized as a very capable and enlightened ruler). Again the foot are from Irregular Miniatures and the mounted from Chariot Miniatures. 


Other "non-core" Greek City States: The front army is Thessalian (the only 'horse heavy' Greek army), a collection of figures from various manufacturers (hoplites from Chariot Miniatures, psiloi I think are from Tin Soldier, the horses from Chariot Miniatures and Essex Miniatures). Behind them are the Phokians (no that's their historical name honest), mostly light troops and a few hoplites (all from Essex miniatures - I have to sadly say Essex  hoplites are my least favourite figures of all time, it's the spear pose in particular I don't like, but the hoarder I am I won't throw them away, hence their demotion to possibly the worst Greek DBS army!).   


All the above armies are usually found fighting each other. Only the threat of the massive Persian invasion of Greece in 480BC (or BCE now as some modern historians have it) brought any form of uniformity of cause. The combination of the above armies should also allow me to field a Basic Impetus Greek Army (well certainly one and possibly a Greek (Athens/Sparta) versus Greek (as in Thebes) match up as well).

Back to reading Herodotus, The Histories, Chapter VII now, the Great King has made his preparations and has crossed the Hellespont on his big bridge of boats ;)

Next: Men in Trousers

Monday 23 July 2012

Readings and Musings : Greece and Persia

I don't seem to be making much progress on the figure painting front, ho hum, as by the time I have sorted stuff out and placed it onto a mobile "painting tray" I soon find myself putting it all back away again with little or no forward progress  :(

The up-side I am reading more of the back log of those historical novels I have lurking on my shelves. I have just completed "Killers Of Men" by Christian Cameron (see below) and shamelessly enjoyed it tremendously: 


So much so I have now started "Marathon", part II of a his many-part(?) ancient series (see below):


It is a teasing series and has encouraged me to pick up (once again) "Herodotus: The Histories". I have skipped ahead to Book 7 which is post Marathon as it neatly ties in with the long term "Greeks in Peril" DBA Campaign 'historical project' I have been hankering over these past ten years. I now have all the DBA armies required (bar a few patch up jobs to do on a few bases) but now there is talk of doing it with Basic Impetus instead of DBA version 2.2. The question is whether is I can get my act together and arrange a firm "campaign day" or end up reading Book III in Christian Cameron's series over the summer instead.


What next: Consolidation of focus or divergence of project aims?

Wednesday 18 July 2012

Vietnam Air Combat: Intense Missile & Gun Combat

Flying straight level and fast, I hear over the radio we are in combat with something I cannot see yet. I can see a friendly fighter pair so a vector in on them (see below). I also make my first mistake in the game, "Do you know what it is yet?" No peeking ahead. 


Next turn I am still flying straight and lever but faster, still trying to see the enemy. My thumb is twitching over the after burner button. I cannot resist, I press it and decide to add to the atmosphere with a home made sound effect of an afterburner (or rather a man with a runny nose and cold pretending to be a jet plane at an air show, dignity none, stares quite a few). Meanwhile the first pair of Mig 17's are tangling with the Phantom's. Pity the Phantom's only arm after three hexes and yes no close in guns for the Americans but plenty of cannon fire for the NVAF! (see below): 


A 'lucky hit' and a Phantom starts to burn (see below). I suddenly realise my first mistake, I should have started warming up my missile release battery (it takes two turns) as soon as I knew we were in combat. I will be in combat but my missiles won't be able to fire! You have to be careful as the battery life is only twelve combat turns.


I see the enemy. I am flying straight and very, very fast. I have also climbed a level to be at the American's height. I am not looking forward to the next move as I will have to figure out how to turn and work out what legal move I have made (remember the charts?). My wing man Russian fires at a Phantom and misses and a Phantom returns fire at me. One Phantom is so close I can read his tactical markings. If he survives Vietnam he'll probably make senator one day (see below):     


A USAF Phantom pilot ejects initiating an infamous Search And Rescue (SAR) mission behind enemy lines. Meanwhile I successfully work out how to do a legal turn, even turning on the after burners (with the obligatory sound effect). This lines me up nicely for a missile strike from the future senator (see below). Luckily he's pulled too many G's this go so cannot release his Sparrowhawk this turn . Next turn I am probably dead meat. However 'three' Mig 17's are lined up on his tail (count them, see below): 


The Phantom is mortally wounded. The pilot ejects, initiating a second US SAR mission. With two Phantoms down  and out numbered 3:1 the USAF jets decide to bug-out and live to fight another day (see below).  


Intense, but extremely good fun, though it took three hours to play a short game of five combat turns, but we were all new to the game. This scenario seems weighed heavily against the Americans, but historically they found themselves missile heavy with no short range armament. Worse still, because there were so many friendly US jets in the skies above Vietnam to avoid "blue-on-blue" incidents visual confirmation was required before missiles could be fired. To get a good visual you find yourself within 'gun range' and the NVAF know they have the advantage if they can stay close. A cruel vicious circle which partly explained why the US kill ratio dropped from a massive 16:1 in the Korean War to an almost evens 2:1 in the Vietnam War. Worse still the US investment in each plane and air crew required to fly it was much heavier.
  

Tuesday 17 July 2012

Check Your Six - Jet Age (Vietnam)

I turned up at the Hartlepool club mulling over ancient Greek and Persian army lists, only to find myself flung into the cockpit of a North Vietnamese fighter plane. Looked right and found a pair of friendly camo 1/600 Mig-17's (see below):


I was flying a pair of Mig-21's (gasp of air in sudden appreciation of the state of the art Soviet aeroplane design) armed with the "people's air-to-air" missiles and a large cannon. Psst, don't tell anybody but one on the left with the blue nose cone is really a Russian, wink (see below):


Oh, the Imperialist 'Hunting Dogs" flying something that looks like the Starship Enterprise from Star Trek, the F4 Phantom with lots of missiles, but no short range guns (see below):


Looking down at my cockpit control panel, I had a sickly sort of sinking feeling, as it looked slightly more complicated than the WWI Canvas Eagles the rule system I was told "Check Your Six " was related to (see below):   


Oh look, there's also another side with pretty diagrams on it (see below). Most of them seem to go sort of straight and very fast, that's my plan :)


Meanwhile on another table a general dressed in blue with a nicely based horse army of late Sassanid Persians was facing a "horse heavy" opponent whose army was in the process of re-basing "sabot" fashion (as in terrain base with a slot for a DBx army element to drop into) for Impetus (see below):   


The roar of the jets brought me forward two thousand plus years.

Next: Combat

Saturday 14 July 2012

The end of an Indian Summer (DBMM Battle V)

Nothing can be said against the fighting spirit of the Indians, as again and again on the Roman left the Indian mounted forces came at the Legion. the Indian commander cursed the sheer amount of PiP points he needed to successfully control his irregular and impetuous troops. Again he cursed the Roman "scorpion" artillery for causing costly PiP point disarray to his battle lines. The result was a piecemeal combat as the Indian troops were fed in dribs-and-drabs rather than one robust wave of death delivering a mounted apocalypse (see "the last Indian huzzah" below):


The result was never really in doubt, the only surprise was how few Roman casualties there actually were (see below). The Roman Legion in the top half of the picture has just performed another "anti-cavalry" surge forward (see previous post for more details of this dubious tactical rules twist).


Back in the center only a few residual Indian troops remained. The central Indian (main) command had already taken two thirds of the casualties needed to break it (see below). True the Gaul's too were taking casualties, but as they were a 'minor command' the exchange rate was good for the Romans. The summer harvest of Indian wheat was soon to come to an end as the Indian reserve line of elephants wee being mustered just out of camera shot for a devastating counter attack.


Crunch, "Nelly" takes out the Gaul warband leader but it is already too late for the Indian cause (see below). The Indian mounted right wing shatters and a few points in the middle will seal it for the Romans. The hoards on the Indian left never got into the fight and the Roman Legions are all still pristine and intact. Pax Romana!  


The only melancholy moment for the Roman command is the near complete annihilation of the Gauls. Some say they were left to die as once 'victorious' Gauls become a liability and Romans don't have to pay dead allied mercenaries from their treasury. A Gaulish tribe denuded of its menfolk soon becomes fodder for the expanding Roman empire. As a rising star of Rome, the Console in command of the Roman forces congratulates himself on a brilliant victory, however nobody notices the silent shadow of the Gaul's Druid shaman leaving the Roman kitchen area. The Console had such a liking for fine Gaul wine it will soon be his own poisoned undoing. The shaman knows his fate will soon be entwined with a Roman sword, but at least his fallen brethren will have been avenged to some degree.  

Thursday 12 July 2012

The Roman Garden Strimmer of Death (DBMM Battle IV)

The clatter of broken wheels, chariot and horses ushered in the demise of a Heavy Indian War Chariot (see below):


It had to come:
Then the long awaited session of "bickering DBM style" (and unfortunately still part of the DBMM experience) of "yes you can, oh no you can't" movement and "Zone of Control" quibbling (yawn). The Roman procrastination (I can say that as I was a nominally Gaulish Roman commander) finally relinquished over the disputed "5mm" in question (see below), I kid you not! Anyway we eventually got on with it and rolled the dice. The result was that the Indian's formed a cohesive supporting line, but did no damage to the Roman line.


On the Indian left flank the "masses" of untrained hoard and inferior auxillia edged slowly forwards each other (see below):


Meanwhile another Heavy Indian War Chariot dies, along with a base or Cavalry (see below). It's not looking at all good here for the Indians! What about those Gauls in the center?


Answer: Hellishly brutal, more Indian Blade elements disappear (see below):


This danger to the Indian forces is followed up by a deadly flank turn by the already victorious warbands of the earlier rounds and the committal of the final three angry Gaul warbands to the fray (see below):


The Indian center looks like it is going to 'pop'.

Next: Snap, Crackle and Pop

Wednesday 11 July 2012

The Gauls of Doom: The Warband Lawnmower is Released (DBMM Battle III)

The ineffectual Indian arrow storm from the massed bows had the rather predictable effect as they continued to rain down on the mass of Gaulish warbands (DBMM rules note: Again if the 'correct' modifiers [+1 combat effectiveness of bows not being fired at] had been applied then maybe/probably fatalities may/would have followed ... but instead) enraged warbands took 'outcome' moves shuffling forwards (see below):


Boy those Gauls do look angry and they seem to be "just within" a healthy charge distance of those annoying Indian bows (see below):


A long line of Gauls, including two 'particularly vicious' double warbands supported by light Psilio (soak-offs) manage to hit the Indian archers (see below). The Indian commander starts to look rather nervous and fingers his dice anxiously. 


Meanwhile the "hoards" and "riff-raff" on the Inadian left and Roman right practice marching and turning to face the enemy in parade ground fashion (see below):


On the Roman left and Indian right the Roman "Legion" reveals its "cunning plan", a planned surge at the Indian Chariots (DBMM rules note: On the Legion's turn attacking the chariots seems to make sense by lessening the deadliness of the Indian Chariot's combat factors and the Legion counting attacking overlaps in its favour despite fighting mounted - there was some earnest discussion as to the correct combat modifier interpretation of the latter point). Please also note the flanking move to 'close the gate' on that rightmost Indian Chariot, ow! Good dice will be needed in its combat now (see below):


Meanwhile in the middle of the battlefield the Gaulish warbands attacks are resolved. Stunned silence from the Indian commander as the Gaulish 'lawnmower of death' simply  "removed from play with no thought to the notion of dignity" the double ranks of Indian bows, leaving only outflanked isolated pockets of Indian bowmen to continue a token of resistance (see below):  


The Indian cannot be looking forward to the next round as there are three other equally dangerous warbands just wanting to get stuck in to the attack too. Perhaps the Indian will receive  better news from the chariot versus legion battle?

Rules Note:
Apart from the earnest "chariot v legion" rule discussion(s) DBMM seems to be playing quite well and sensible. Things seem to be fighting in 'formational blocks' which makes historical sense of sorts.

Next: The Carnage and Confusion Mount ...

Monday 9 July 2012

Gaul's Do It Best When They Are Drunk (DBMM Battle Part II)

The Gauls surge forward, a tight bound mass of heaving sweating warbands fronted by a line of light Psiloi, taking full advantage of the rough ground as a hiding place from the Indian mounted (see below): 


A downside to this cunning plan is the double ranked bank of Indian bows about to "darken the skies" with a thunderstorm of arrows (see below):


The result was predictable, with most but not all of the line of "lights" running to the back of the warband for shelter. Presumably the warband are too drunk to notice (see below). No fatalities which was a huge bonus. (Footnote: After battle analysis revealed a missing DBMM modifier that was not applied. When 'bow' fires but is not fired back at, there should be a +1 modifier in their favour. Which means by laws of statistics one or more of those Psiloi would have been as dead as a Monty Python parrot. Also so much for the players who had read the rules from cover to cover, this was only the third time the Indians had fielded a mass or archers, methinks even the Roman could have pointed this out!).


On the Indian right their mounted surge forward. As part of a cunning anti-mounted tactic the "Legion" have spent their PiPs deploying a curious tactical group into another rough area. A 'flawed' secure flank or a 'sally point', only time will tell (see below):    


Subtle modifications, the "Legion" moves up just out of camera shot to the right and the Auxillia of the "Legion" lining the rough form the flank of an 'L' (see below): 


Meanwhile over on the Roman right, the "other Legion" hugs the hill like their mothers beast to protect them against vicious looking Indian War Chariots, while a 'mish-mash' of other troop types are pushed (probably against their will) around the Indian left flank (see below):  


I have to confess, certainly up to this point the DBMM rules seem to be playing very well, with a pleasing looking historical troop blocks and no bickering quibbles.


Next: More Arrows and the Warband's Charge of Death or Gory Glory

When India fought Rome (DBMM Battle Part I)

Joining in as a tactical General to the local Redcar war gamers on going (hypothetical) ancients campaign I was given a command in a Roman Army being attacked by Alexandrian Indians. I was in charge (if such a thing is possible) of an allied contingent of Warband Gauls (see below far left, with the Legion on the right): 


The impressive Indian Army faced us off (see below). Standing on a hill and looking down on the stoic Roman forces there seemed to be an awful lot of them and rather worryingly a lot of mounted, hence the Roman General's choice of as much rough terrain as possible please.


Two "Legions" seemed to be involved on the Roman side. The main battle-line plus a diversionary one placed off to the left (see below). His General was told to amuse and distract the Indian left by taking hold of and then sitting on a large hill. 


Meanwhile a host of Indian Hoards would most likely assail it (see below). The sighting of multiple mounts of Elephants caused some concern in the Roman/Gaul camp. The Roman C-in-C's plan seemed rather simple "Get the Gaul's drunk and let them do all the fighting" and then see what happens.


This would also be an interesting run out for the DBMM rules now that some of the players professed to have actually read them cover to cover (hold the front page). Would this help considering the absence of an impartial umpire? Time would tell!

Next: Clash of Cultures